Effective Tips to Use Instagram for Your Photography

As we all know, Instagram is an online platform for sharing images and videos. Unlike other meta platforms, Instagram’s sole focus is only on the image. Most people on this platform share, upload, and explore photography. It is an everyday use of it. 

Instagram has, as of 2022, at least 1.452 billion users. It shows that almost 23.4% of people use Instagram today. So, undoubtedly it is one of the best platforms for photographers to showcase their best works. Because Instagram works like a gallery, it is entirely visual and significantly impacts viewers. 

So, if you are a newbie, mature, or professional photographer, here we’ll share some great tips for using Instagram for your photography to boost your career and bring growth to it. Want to get exposure to your photography journey? Scan through the sections below:

Research Your Photography Niche

The first condition for stepping into the Instagram photography venture is to fix your niche. Because, for creative works, niche plays an important role. Niche is the area of your particular expertise. 

For instance, if you have been a professional photographer for years doing a wedding or newborn, you’ll know the ins and outs of this genre. As a result, your portfolio would look skillfully professional and premium, earning the client’s trust. 

Like on Instagram, if you know your niche (it could be anything), stay firm on it. Keep posting your photography content. If you look around, you’ll see most of the audience is doing the same.

Put Your Best Foot Forward

Always remember that on Instagram, you create your content for your followers. Make them Wow with your photographs. Create an impression that sticks to your profile, and then revisit it. Additionally, put your Instagram handle on high priority because one average or below-average photo could wash away all the charms of your Instagram profile. 

Note:

  1. Don’t be in a rush.
  2. Be consistent.
  3. Don’t spam with too much posting on Instagram.
  4. Select your photographs carefully.
  5. Keep the best photos only. Erase the rest of the images, even good ones.

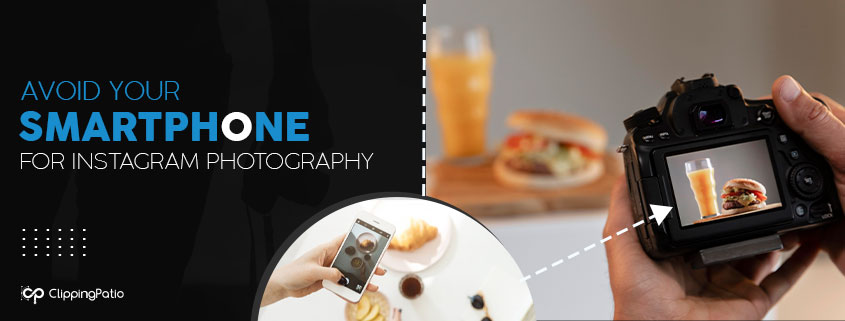
Avoid Your Smartphone For Instagram Photography
Avoid-Your-Smartphone-For-Instagram-Photography

Even though nowadays, smartphones click way better than they used to in recent years. But, it lacks the functionality of a DSLR camera. The difference is identical. When it comes to photography, it creates a visual impact on the audience. Smartphone photography fails to make it because it has a significant limitation.

You can’t customize the camera settings on the phone. You’ve to work with the default mood of it. As a result, you get what it was designed to deliver, not what you wanted the photo to be. In this case, using a DSLR camera is the ultimate savior. You’ll get to make custom adjustments to the ISO, exposure, shutter speed, etc. You can change lenses according to your photo composition.

Overall, you’ll earn real photography experience since you’d get practical hands-on things to do. So, when you do DSLR photography, it will produce eye catchy professional results. And Nothing works better on Instagram than a high-quality camera photo.

Click Raw And Edit real
Click-Raw-And-Edit-real

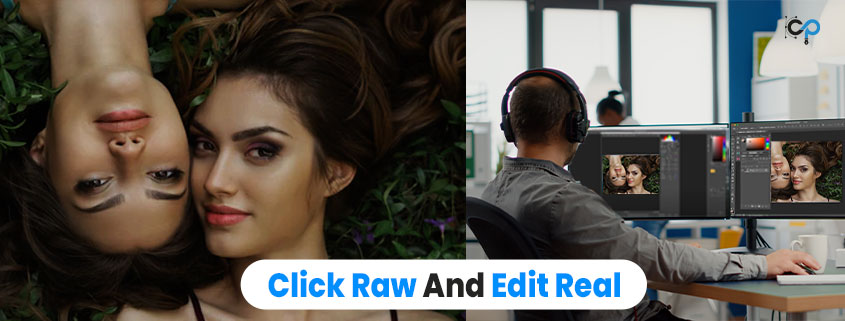
You can click and post it on Instagram right away. But that’s not recommended because photographers click many photos over a day. During work, it is impossible to select good photos. Neither photographer can click perfect pictures in one shot. In this case, producing excellent photography for Instagram takes time. 

It would help if you made a picture vibrant and attention-grabbing. Add texture to your image to make it look aesthetic. Do shadow creation to add depth to your vision. Make contrast and theme color balance in your photo. All of them are possible through Adobe Photoshop, Adobe Lightroom, etc. Once you make a perfect edit and turn your photographs into natural phenomena, you are good to go to upload them on Instagram. 

Make The Best Use Caption & Hashtag

Every photo tells a story. How about you could write one to add another layer to connect more with your audience? Words are magic. If you use them properly, it captivates and mesmerizes the readers. Keep the caption short. 

Try to capture the attention in the very beginning. Otherwise, people won’t read the rest. Build a story, and keep the caption engaging. You can share the idea behind the photographs, how the inspiration approached your mind, the contribution of this photo, and much more. 

Don’t go rush with caption writing. Take your time as long as it takes because every word matters. It must have to be clear and impactful. The hashtags are the next important factor of the caption. Instagram hashtags for photography will help you get in touch with other photographers who share your interests. 

Follow Up With The Community

Next is to step into the community around your photography genre. The time and effort you’d put here would bring your Instagram photography journey a huge plus. 

Follow up the hashtags under your photography. Look at what other people are posting, what they are talking about, what kind of photographs are trending, and much more. Try to get enough information and be familiar with it. In return, you’ll get a warm welcome from your community. You’d get suggestions, exposure, and other necessary help to reach your desired goal with your Instagram photography journey.

Know the Insight Of your Account
Know-the-Insight-Of-your-Account

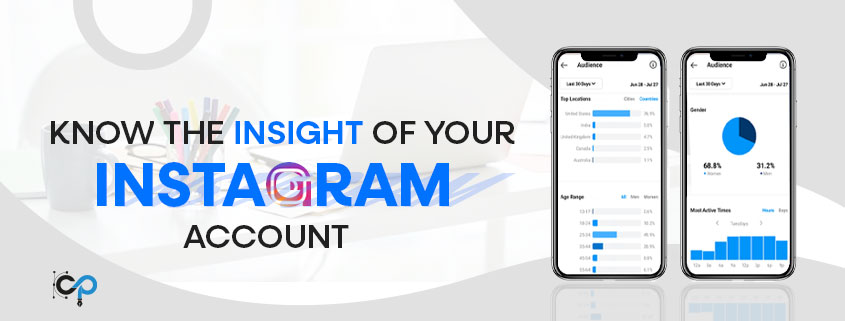
Instagram has a feature called Instagram insights. This feature gives you a detailed overview of the analytics based on your Instagram posts, audience, and others.  Through insights, you’d be able to know the location of your audience, the time they are most active, and much more. With the help of this information, you can post your photographs on Instagram to get maximum engagement from your audience.  And if you are a newbie, you’d get this in the first place. But no worries, research shows that Sunday and morning are always the best times to post. 

So, even if you don’t have the insight option available right now, you can still get the same impression from that tip we mentioned above.  

Join Contests On Instagram

Instagram has big groups to join by following your niche and genre. They hold contents—both free and paid. Try to take part in them. You might not win but get exposure as a photographer on Instagram. It is a great way to hone your photography skills as well. 

Follow The Best Photographers For Inspiration

Last but not least, we’ve got a quick solution for you if you ever face creative blocks and can’t get over them. Always follow the best photographers in your niche and other genres as well. It will help you to keep motivated and feel enthusiastic about your work. 

To conclude, we hope this article helps you to understand the essential aspects of using Instagram for your photography. Now it’s your turn to share your journey with those tips, how it went, how it is going, and much more. Do Comment Below!

Crucial Tips On How To Choose A Headshot Photographer

It’s tedious to look for portrait photography, headshot photographers near me, or the best photographers. As a result, you get tons of results, and the bulk information gets more twisted. The first thing that occurs is: how to choose a headshot photographer. It is a significant factor to consider because it all starts here. 

In this article, we’ll provide you with some tips on choosing a photographer to get the best headshot photoshoots for you. When selecting a photographer, you should focus only on those whose work you like. Don’t go for any good or random photographer. Because it always takes special skills and expertise in specific photography like a headshot. Only take into account headshot photographers whose work and style you desire. 

Scan Through The Portfolio Because It Speaks

It’s always wise to check the previous works of the photographers you would work so, don’t forget to look for the website or their blog to scan through their portfolio. It is how you’d get the idea about their works and all the ins and outs of their photography. Headshot photography has different requirements. Sometimes it is creative; sometimes it is monochromatic, or other. 

In this case, you must know beforehand what your requirements are, and while scanning through the photographer’s website, you’d get the idea whether they match your needs or not.

For example: if you want an indoor headshot photoshoot and see that a significant portion of their work is based on creative headshot photography, then it is better to look for other photographers. And if you are not sure yet about your requirements, then you can explore the portfolio for inspiration and pick yours. 

Pick The Photographer Who Has Specialization In Headshot Photography

There are various kinds of photographers. It is a boundless form of art. As people follow their particular interests, some like to click on food photos, street photos, landscapes, etc. They have spent a lot of time honing the style of craft they work. That’s why you better go with the one specializing in headshot photography. There’s a massive difference between a good photographer who can click any good photo and a headshot photographer.

Note that the art of taking headshots is unique in itself. Shots must be of a professional caliber, carefully executed, and handled with knowledge. 

Don’t Ignore The Reviews

Research and survey say 90% of people get influenced by online reviews. It means for almost everyone; it works like a deciding factor. That’s why the ideal method to learn about a particular photographer and the outcomes they produce is to read what their past clients say about the service and related things. Keep an eye on the photographer’s communication before the shoot, their behavior while on a shoot, and how carefully they handle the editing. 

Make Constant Communication 

As we all know, communication is the key. It is the same for this case. It is building a communication bridge with your photographer. It would make you comfortable because it is necessary to be at ease with your photographer. 

Else, the project won’t move forth as you won’t be able to provide the expression that comes naturally to you. Other than that, communication is vital because photographers sometimes direct, provide feedback, and share technical details that help to bring a better outcome. 

Verify the price is affordable for you

Make sure you fully understand what you’re paying for before engaging with a headshot photographer, whether there are any terms & conditions and data security. Knowing additional photographs, location, resolution, and much more is essential. Although negotiating is common, remember that better results don’t necessarily mean spending more money.

Gather Basic Gear Knowledge Of Headshot Photography

Why? Because if you know the core essentials about the gears of headshot photography, you’d be able to check intensely on the photographer whether he’s going with the right equipment. Because a headshot shows personality, and better gears produce fantastic quality. 

For example, A camera with interchangeable lenses and the capacity to shoot in RAW high-resolution features would perform amazingly. Also, a broad ISO range, a hot-shoe for flash compatibility, and the ability to shoot while connected to a computer would be enough to kick start. Other things like lenses, lighting, settings, etc., would come eventually. 


FAQs

What is a headshot photo?

Ans: An image of a headshot usually shows the face and hair down to the shoulder level.

Is headshot photography a particular skill?

Ans: No skill comes in handy. In this sense headshot photography is a particular skill that requires experience. It could be self-taught as well. 

How much would you pay for a professional headshot?

Ans: The rate for headshot photography differs. You can go hourly or purchase a package with one time payment. Generally, the cost is around, 50$ to 450$.

What lens should I use for headshots?

Ans: Typical focal lengths for headshots include 85mm, 105mm, or 135mm. Also popular with headshot shooters is a telephoto zoom lens with a 70–20mm focal length range.

What color should you avoid for a headshot?

Ans: Colors you should avoid for a headshot are: super-saturated cherry reds, hot pinks, and most “neon” colors.

How to Do Headshot Photography at Home

If you are looking for ways to do headshot photography at home, you’d get the secret recipe here. 

Generally, a headshot is a portrait photo focused on the face and the shoulder up. Initially, headshot photography was for presenters, actors/actresses, models, and others. 

In the course of changes, now, a headshot is no longer reserved in its usage. Common people do it these days. However, professional headshot photography is quite pricey. But getting Inspired by that, we’ve got some tips for the photographers to do headshot photography at home. It’ll also work for you if you want to take your headshot pictures at home. So without further adieu let’s start with it. 


Headshot Photo Editing and Retouching Video Tutorial – Part 01

Types of equipment You Need Before Starting Your Headshot Photography At Home

Tools always make things easy. For photography, it helps like a charm. Because bare hands couldn’t stand steady as a result it turned the photos blurry and fuzzy. And you can’t take such a risk for headshot photography that is portrait centric. It reflects an intense subjective persona. 

Therefore, make sure you have the correct tools in order to get the most out of your work. They are: 


Tripod 

It is a lifesaver for everyone whether a professional photographer or a habitual photographer. It keeps the camera and additional equipment along with it steady. 

The firmness of the camera provides better access to the angle and composition. However, you can use it for your smartphone photography as well. When you have a tripod, you need no other people to click the photo for you. 


Reflector 

This device increases the amount of light. It adds more light to your face. You can position it or ask someone to assist.


Backup Charger & Storage

Make sure you have a power bank and memory cards if you’re utilizing professional camera gear. Because of your preparation, you won’t have to rush through your photo session or worry about running out of room.

Ideal Camera Setting For Headshot

One must know the basic camera setting before shooting any photo. At least the core camera settings. So that you can improvise on them and find out the ideal one for your headshot photography project. Modern cameras have the auto mode which enables the cameraman to take photos of selected presets. It might click out some good pictures for you but it won’t be up to the mark with pixel-perfect quality. It‘d lack the features that make a top-notch photo. 

In that case, you must move to custom camera settings to make an impactful result. In manual mode, you get a lot of access and option to utilize them in your photography. Just keep the things your mind while working on headshot photography (any other as well) 


Aperture

For headshot photography, the first and foremost requirement is the aperture. But For many photographers, the most perplexing component of photography is the aperture. Because it brings amazing effects. 

However, for headshot photography, the background must have to be blurred and the sole focus would be on the facial area. People frequently become perplexed by the numbering system of aperture or f spot. The quick way to remember is, The hole gets bigger the smaller the number is.

In this case, the ideal setting would be f/1.8 and f/2.5. The background will be hazier the smaller the number. Your face will be beautifully blurred and every detail will be captured with an aperture like f/2.5.


ISO

The International Organization for Standardization referred to ISO. It establishes the sensitivity of the camera to light in photography. In general, the best ISO settings for entry-level cameras are 100-3200 and 100-6400, respectively. 

You must keep in mind that if you are taking a headshot in decent lighting, your ISO level doesn’t need to be high. The lower it is, the less grain will be visible in your final output.

Color temperature

Color temperature plays an important role in headshot photography. Because headshot photography needs to be done in natural light. Extensive color ruins the purpose of the headshot. That’s why it is recommended to keep a natural balance of the color temperature in the headshot instead of too hot and cool. 


Shutter Speed 

This controls how quickly your camera captures a photo. Make sure your shutter speed is quick since you want your headshots to be sharp.


Background

The background doesn’t play much of a vital role in headshot photography. However, it doesn’t mean you can go on with any sort of background. What is significant here is that headshot photography is more than just focusing on the background because it works well. Veteran headshot photographer

Avoid Saturated Color Clothes

Proper outfits put the whole focus on the face. That’s the purpose of a headshot, to center the whole focus of the audience on the face of the subject. That’s why it is recommended to wear simple clothes and avoid accessories while shooting for a headshot. For dresses, try to choose a plain color with a simple pattern. It helps to reduce over-exposure. 

Pick A Plain Location With Enough Light

Professional headshot photographs are inspiring because of the setting and eye-catching arrangements. However, they use amazing locations to bring that kind of result. But you can do the same thing at your home. All you gotta do is to find a suitable place where you get enough natural light. Avoid midday. 

Try to take pictures when it is sunny or cloudy. For background, it is not much to worry about. Anything simple like a white wall would be enough. Also, you can use the reflector if you don’t get the proper light on the subject for headshot photography.

Determine The Best Facial Angle

Generally, people have a preferred perspective that helps them appear more attractive in photographs. If you know yours then it’d help you in headshot as well. Make sure your arm isn’t squeezed by standing obliquely toward the camera. It appears oddly wide. 

Your arm should be stretched out to the side or held out to the side by putting your hand on your hip. Sideways glare should be avoided. Make sure you can see your face in its entirety by slowly turning your head.

Experiment, Express, And Edit

Photography is an art. It has no barrier like all other art forms. You try a lot of different things in what you do. You can shift moods, try to smile naturally, stand closer to the lens, try different angles, get into more effective approaches, and much more. 

With headshot photography, you can be expressive. It is ideal for portraying such emotions. Try to get inspired by the experts, evaluate your clicks, share them with your friends, and take the feedback. Redo, Re-edit, and hone your skills. 


FAQs


  • Can You Take A Professional Headshot At Home?

      Ans: Yes, you can. It is easy and simple with few details in mind. 


  • What Are The 3 Most Important Camera Settings?

      Ans: The three most important camera settings are: Aperture, ISO, and Shutter Speed.


  • How much would you pay for a professional headshot?

     Ans: The price range differs. It depends on the agency or photographer. However, the general range is 50$ to 450$.


  • What are your best tips for taking a professional headshot yourself at home?

     Ans: We’d say, a proper camera setting, natural expression, cool color clothes, and lighting would be enough to take a professional headshot of yourself at home.  


  • What is the easiest, most affordable way to take headshots?

      Ans: Asking someone else to take your headshots is the most convenient and cost-effective option. Anybody with little headshot photography expertise or experience, even friends, could be the subject.